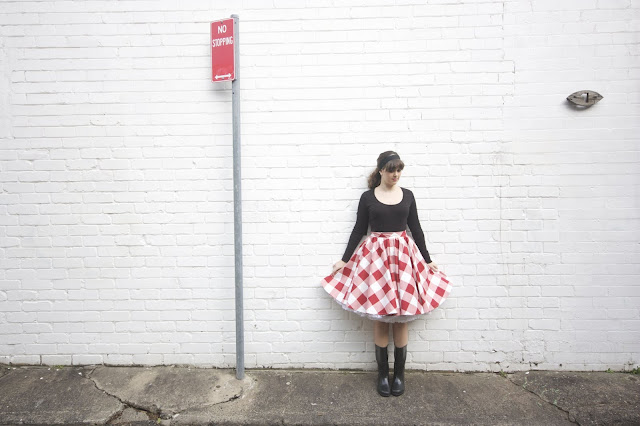
I had grand plans when it came to photographing this skirt. Considering its picnic cloth nature I imagined green parks, tea cups and sunny skies. Unfortunately, the world did not oblige. Instead, it gave me torrential rains, gale force winds and dreary skies.
Generally speaking, I’m not one to complain when we have weather like this – I love the rain. For some odd reason I’m happier of a morning if I wake up and its grey outside. I sound like a severe melancholic, but I’m not, honest!
So, after waiting a few days, I decided, gray skies or not, I’ll take pictures of my new skirt. Of course the day after was a crystal clear day, but I was busy, and liked the gray skies in the pictures regardless.
I like to think that this skirt adds a little sunshine to any day, not matter what is like; it’s simply the happiest skirt I own.
I cut out a full circle, using Burdastyles Linda pattern as a reference, with the waist measurement double which it needed to be, then gathered it to my waist measurement. After it was gathered and attached the waistband it ended up being just a bit bigger than a full circle, which is BIG! The waist band was a simple strip, which I folded over and reinforced with interfacing.
Its perfect for twirling in!
I used a lapped zipper and two buttons on the waist band for the closure. I had never made a button hole before, partly because I lost the buttonhole attachment to my sewing machine, and partly because I had always assumed it would a massive pain in the behind. For a year now I have successfully avoided all button hole related garments, using “faux” buttons if necessary, with snaps behind.
Since I have been practicing my embroidery, I decided to try my hand at bound buttonholes. My word, I’m like a proud child, with the best buttonhole in the class! They were so pretty; I’m just kicking myself that I didn’t take a close up picture, so you’ll just have to take me word for it.
Do you use your machine to make buttonholes, or do you hand bind them? I’d love to hear about the techniques you favour in regards to this?
I cut the skirt late one night and stitched it up on the second. Minus all the tea breaks, mindless tv watching, and downright dawdling, this skirt really only took about 2 hours to make, the most tedious part being the hemming. Thankfully the fabric (cotton sateen) had a little stretch in it so I was able to ease it a little easier, though I feel in some parts I may have stretched it a little too much.
I would certainly recommend trying your hand at this pattern if you’re looking to add a little vintage flair to your wardrobe. It’s so easy to make and so much fun to wear!
Click here to see larger picutes.


